Map Network Drive in Windows 10
Map a Network Drive in Windows 10
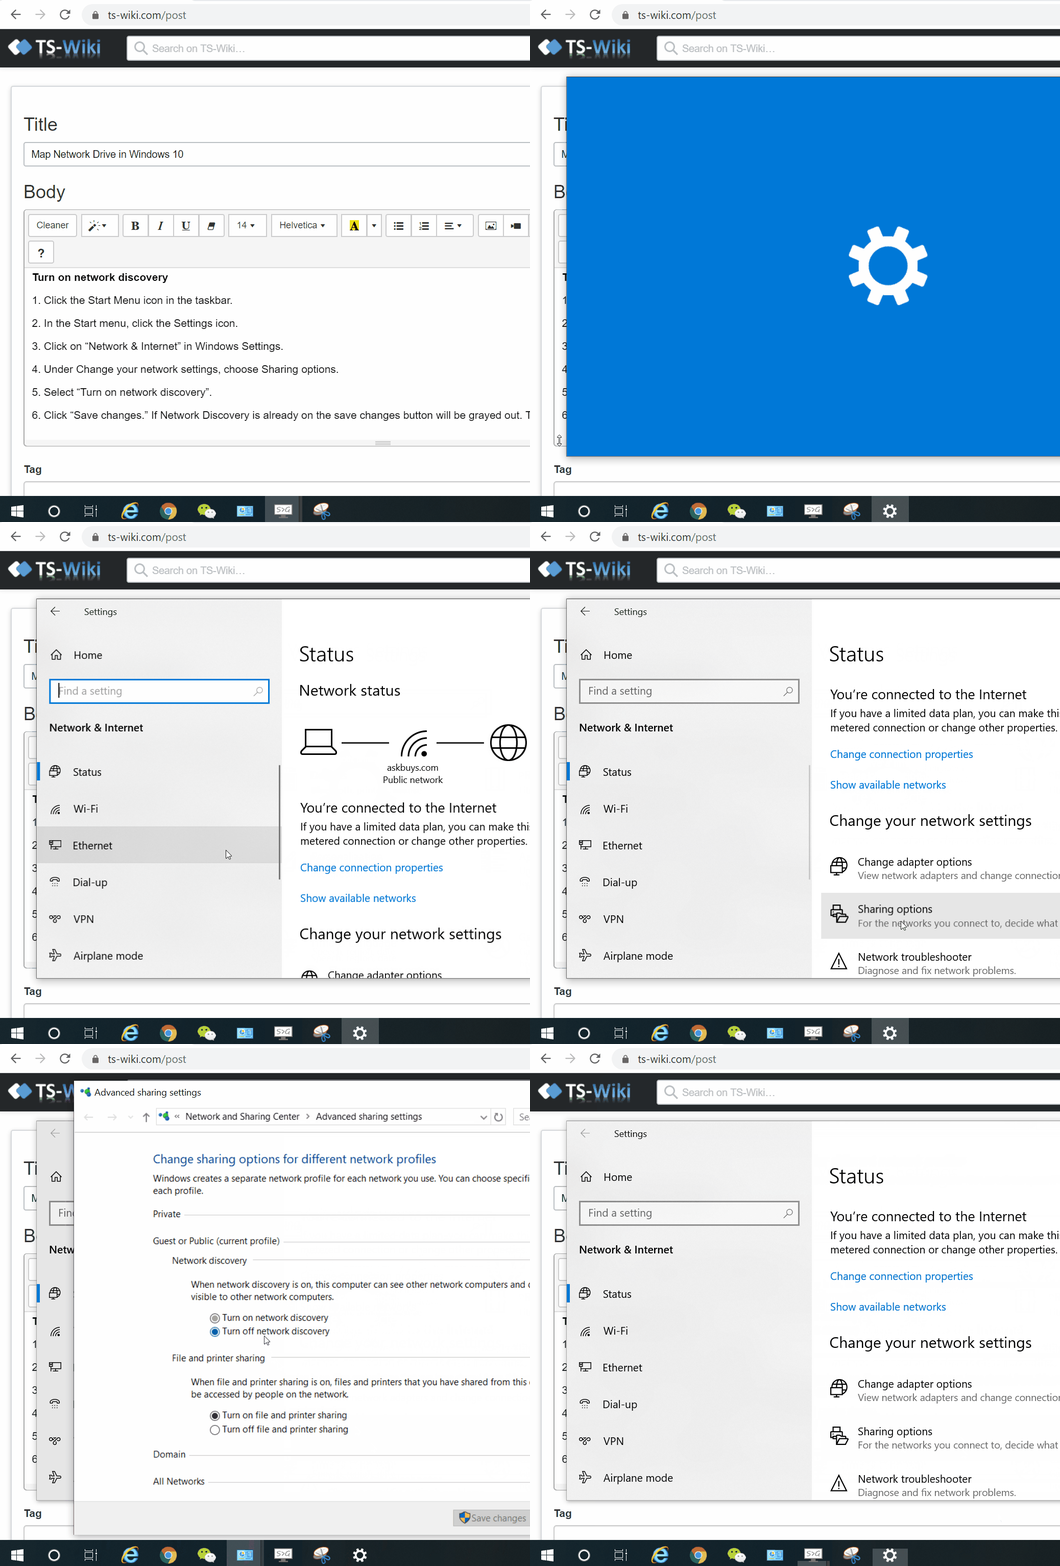
Turn on network discovery
1. Click the Start Menu icon in the taskbar.
2. In the Start menu, click the Settings icon.
3. Click on “Network & Internet” in Windows Settings.
4. Under Change your network settings, choose Sharing options.
5. Select “Turn on network discovery”.
6. Click “Save changes.” If Network Discovery is already on the save changes button will be grayed out. Therefore you can ignore this step.

Prepare for mapping
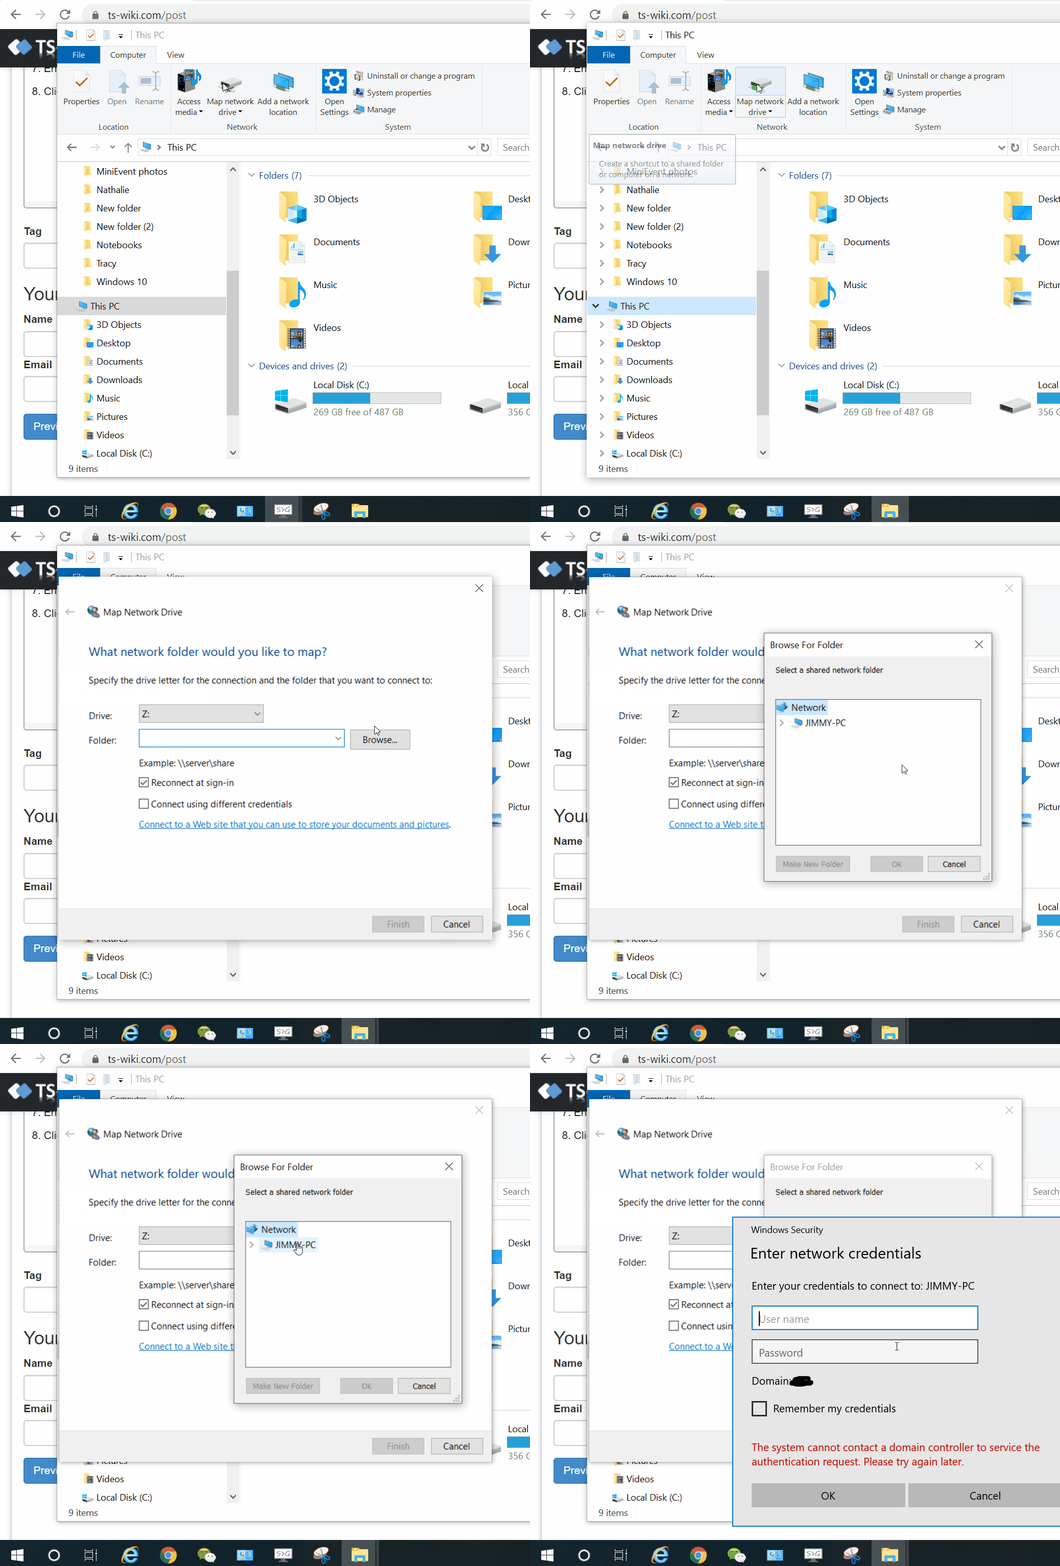
1. Open File Explorer
2. Select “This PC” from the left sidebar.
3. In the sub-header, click the Map Network Drive icon.
4. In the Map Network Drive, Specify the drive letter for the connection.
5. Click the Browse button to select the folder you want to connect to.
6. Select the folder you want a connection to and click OK. Fill in the username and password to map the shared folder if asked.
7. Ensure “Reconnect at Sign-in” is checked.
8. Click Finish.

You can express your appreciation and support to the Author by clicking on a Google advertisement in this website.
Got question? Contact us at info@ts-wiki.com